
Master the Art: How to Develop an Augmented Reality App for Android
Embarking on the journey to develop an augmented reality app for Android opens up a world of innovative possibilities, transforming how users interact with their digital and physical environments. This comprehensive guide, crafted by an SEO expert, delves deep into the intricate process of building cutting-edge AR applications for the Android platform, providing invaluable insights for developers, businesses, and tech enthusiasts alike. Discover the essential tools, fundamental concepts, and step-by-step methodologies required to create captivating and immersive experiences, leveraging the power of mobile augmented reality. We'll explore everything from conceptualization to deployment, ensuring you have the knowledge to bring your vision to life and capture the attention of a vast Android user base.
Understanding the Foundation of Android AR Development
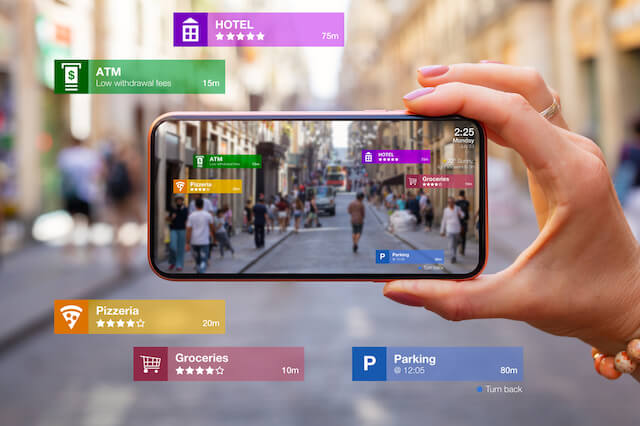
Augmented Reality (AR) overlays digital information onto the real world, enhancing perception rather than replacing it, unlike Virtual Reality (VR). For Android, this means using a device's camera, sensors, and processing power to seamlessly integrate virtual objects, data, and interactive elements into a user's live view. The proliferation of powerful Android smartphones makes it an ideal platform for delivering accessible and impactful AR experiences, from gaming and entertainment to practical utilities and educational tools.
Why Develop AR Apps for Android?
The Android ecosystem boasts the largest global market share for mobile operating systems, providing an unparalleled reach for your augmented reality application. This vast user base, coupled with the platform's open-source nature and robust development tools, makes Android a prime target for AR innovation. Developing for Android allows for greater flexibility, wider device compatibility (though performance varies), and access to a diverse audience ready to engage with next-generation interactive content. The continuous advancements in Android's hardware capabilities, especially concerning cameras and processors, further solidify its position as a leading platform for mobile AR development.
Key Technologies for Android AR: SDKs and Engines
The backbone of any successful Android AR app lies in its chosen Software Development Kit (SDK) or game engine. These tools provide the necessary frameworks, libraries, and APIs to handle complex tasks like motion tracking, environmental understanding, and light estimation, which are crucial for realistic AR experiences.
Google ARCore: The Android Standard
ARCore is Google's platform for building augmented reality experiences. It's designed to enable your phone to sense its environment, understand the world, and interact with information. ARCore focuses on three key capabilities:
- Motion Tracking: Allows the phone to understand its position and orientation relative to the real world, enabling accurate placement of virtual objects.
- Environmental Understanding: Detects the size and location of flat horizontal surfaces (like tables or floors), crucial for placing AR content.
- Light Estimation: Helps your app match the lighting of the virtual objects to the lighting of the environment, making AR content appear more realistic and contributing to an immersive experience.
ARCore is deeply integrated with Android Studio and provides a native, high-performance solution for Android-specific AR applications. It's often the first choice for developers focusing solely on the Android platform due to its optimized performance and tight integration with Google's services.
Leveraging Unity 3D for Cross-Platform AR
While ARCore is Android-native, many developers opt for game engines like Unity 3D for their AR projects. Unity offers a powerful, cross-platform development environment that supports ARCore (via Unity's AR Foundation package), Vuforia, and other AR SDKs. Its visual scripting capabilities, extensive asset store, and strong community support make it an excellent choice for creating visually rich and interactive augmented reality apps. Unity simplifies the process of integrating 3D modeling assets and complex animations, making it a favorite for games and sophisticated enterprise AR solutions.
Exploring Vuforia Engine and Other SDKs
Beyond ARCore and Unity's AR Foundation, other robust AR SDKs are available. Vuforia Engine is a popular choice known for its advanced features such as object recognition, marker-based AR tracking, and cloud recognition capabilities. It's particularly strong for industrial applications, product visualization, and interactive marketing campaigns. While ARCore primarily focuses on markerless AR and plane detection, Vuforia offers more specialized tracking options. Other SDKs like Wikitude, ARKit (for iOS, though sometimes used in cross-platform contexts), and custom computer vision libraries also exist, each with specific strengths for different project requirements.
The Step-by-Step Process to Develop an Augmented Reality App for Android
Building a successful Android AR app involves a structured approach, moving from initial concept to final deployment. Each phase is critical to ensure a high-quality, stable, and engaging user experience.
Phase 1: Conceptualization and Planning
Before writing a single line of code, thoroughly define your AR app's purpose. What problem does it solve? What unique value does it offer? Who is your target audience? Consider the core features, user flows, and how users will interact with the augmented reality content. This phase also includes sketching out the user interface (UI) and user experience (UX) to ensure intuitiveness. Think about the type of AR experience: Is it a simple object viewer (marker-based AR), an interactive game placed in a room (markerless AR), or a utility tool for measurements? A clear vision at this stage saves significant time and resources later. Also, consider potential AR app monetization strategies early on, such as in-app purchases, subscriptions, or premium features.
Phase 2: Design and Asset Creation
The visual quality of your AR app heavily relies on its 3D assets. This phase involves creating or acquiring 3D modeling assets (objects, characters, environments) and animations. These assets need to be optimized for mobile performance, meaning lower polygon counts and efficient textures to ensure smooth frame rates and prevent battery drain. UI elements, sound effects, and any other multimedia assets are also prepared here. Artists and designers skilled in tools like Blender, Maya, or 3ds Max are crucial for this stage. Remember, the goal is to make virtual objects blend seamlessly with the real world, requiring attention to detail in texturing and material properties.
Phase 3: Development Environment Setup
Setting up your development environment is a foundational step. For native Android AR apps, Android Studio is the integrated development environment (IDE) of choice. You'll need to install the latest Android SDK and relevant platform tools. If using ARCore, you'll integrate the ARCore SDK into your project. If opting for Unity, you'll install Unity Hub, the Unity editor, and then import the necessary AR Foundation and ARCore XR Plugin packages. Ensure your device is set up for debugging, and you have a stable internet connection for downloading dependencies. [Explore Android development best practices for optimal setup here.]
Phase 4: Core AR Implementation
This is where the magic happens. You'll start implementing the core AR functionalities based on your chosen SDK.
- Understanding AR Fundamentals: Grasp concepts like world tracking, pose estimation, and point clouds (used in spatial computing).
- Implementing Tracking: Decide between marker-based AR (e.g., using QR codes or specific images as anchors) or markerless AR (placing objects on detected surfaces). Most modern AR apps utilize markerless tracking via plane detection.
- Placing Virtual Objects: Write code to detect planes (horizontal or vertical surfaces) and allow users to tap to place 3D models. This involves converting screen coordinates to real-world coordinates.
- Interacting with AR Objects: Implement gestures like scaling, rotating, and moving objects. This often involves raycasting from touch points into the AR scene.
- Handling Permissions and Device Compatibility: Ensure your app requests necessary camera permissions and gracefully handles devices that may not support ARCore or the specific AR features you're implementing.
- Lighting and Rendering: Integrate environmental light estimation to make your 3D models appear naturally lit within the real world, enhancing the immersive experience.
Phase 5: Testing and Optimization
Thorough testing is paramount for AR apps due to their reliance on real-world conditions. Test on various Android devices with different camera qualities, lighting conditions, and environmental settings. Debugging AR experiences can be challenging; look for issues like object drift, poor tracking, or performance bottlenecks. Optimize your code, 3D assets, and rendering pipeline to maintain smooth frame rates (ideally 30-60 FPS) and minimize battery consumption. User Acceptance Testing (UAT) with real users provides invaluable feedback on usability and overall experience. Address any bugs, refine interactions, and ensure stability across a range of scenarios.
Phase 6: Deployment to Google Play Store
Once your Android AR application is polished and stable, it's time for deployment. This involves creating a signed application bundle (AAB) or APK, preparing high-quality screenshots and promotional videos demonstrating your AR features, writing a compelling app description, and adhering to Google Play Store policies. Ensure your app listing highlights the AR capabilities and any specific device requirements. Marketing your app effectively post-launch is also crucial to gain visibility and attract users.
Advanced Considerations for Building Immersive Android AR Experiences
To truly stand out, consider incorporating advanced features that elevate the user experience beyond basic object placement.
- Enhancing Immersive Experiences: Implement advanced rendering techniques like real-time shadows, reflections, and occlusion (where virtual objects are correctly hidden by real-world objects) to make AR content feel truly integrated.
- Integrating AI and Machine Learning: Leverage computer vision techniques for more sophisticated object recognition, semantic segmentation (understanding different parts of a scene), or even gesture recognition to control AR content.
- Multiplayer AR and Cloud Anchors: Allow multiple users in the same physical space to share and interact with the same AR experience. Google Cloud Anchors facilitate this by enabling persistent, shared AR experiences across different devices.
- Persistent AR: Explore ways to save and load AR experiences, so virtual objects remain in their real-world locations even after the app is closed and reopened.
- Maintaining and Updating Your AR App: AR technology is rapidly evolving. Plan for regular updates to incorporate new SDK features, improve performance, and address user feedback.
Actionable Tips for Successful Android AR Development
- Start Simple: Begin with a Minimal Viable Product (MVP) that demonstrates your core AR concept. This allows for quicker iteration and testing.
- Focus on Performance: Always optimize your 3D models, textures, and code. Smooth performance is critical for a positive user experience in AR.
- Prioritize User Experience (UX): AR interactions can be novel. Ensure your UI is intuitive, guiding users on how to interact with the virtual content and the real world. Provide clear instructions and visual cues.
- Stay Updated: The AR landscape, especially for Android, is constantly evolving with new ARCore versions, Unity updates, and hardware advancements. Follow industry news and developer forums.
- Community Engagement: Leverage online communities, forums, and developer documentation for troubleshooting, learning best practices, and staying inspired.
Frequently Asked Questions
What are the essential tools to develop an augmented reality app for Android?
The primary tools include Android Studio for native development, or Unity 3D (with AR Foundation and ARCore XR Plugin) for cross-platform development. You'll also need a chosen AR SDK, predominantly Google ARCore, or potentially Vuforia Engine for specialized tracking needs. For 3D asset creation, software like Blender, Maya, or 3ds Max is essential.
How long does it typically take to build an AR app for Android?
The development timeline for an Android AR app varies widely based on complexity. A simple AR app with basic object placement could take 1-3 months. A moderately complex app with interactive features, server integration, and optimized user experience might take 4-8 months. Highly sophisticated apps with advanced features like multiplayer, persistent AR, or complex computer vision could take 9-12 months or more. Planning, asset creation, and rigorous testing significantly impact the duration.
Is coding experience necessary to create an AR app?
Yes, fundamental coding experience in Java/Kotlin (for native Android Studio) or C(for Unity) is necessary to develop an augmented reality app for Android. While visual scripting tools in Unity can simplify some tasks, understanding programming logic is crucial for implementing AR functionalities, handling user interactions, and integrating various SDK features effectively. For those new to coding, starting with basic Android development tutorials and then progressing to AR-specific guides is recommended.
What are common challenges in Android AR app development?
Key challenges include ensuring consistent motion tracking across diverse Android devices and lighting conditions, optimizing 3D modeling assets for mobile performance without sacrificing visual quality, managing battery consumption, and creating intuitive user interfaces for novel AR interactions. Additionally, achieving realistic occlusion and lighting for virtual objects can be technically demanding, requiring deep understanding of rendering techniques and spatial computing principles.
Can I monetize my Android AR application?
Absolutely. Common AR app monetization strategies include in-app purchases (e.g., for virtual items or new AR experiences), premium subscriptions for advanced features, advertising (though less common in immersive AR to avoid breaking immersion), and licensing the AR technology for enterprise solutions. For business-to-business (B2B) applications, direct client contracts for custom AR solutions are also a significant revenue stream. The chosen strategy should align with your app's purpose and target audience.

0 Komentar